Settings
Inventory Settings is where you can define Units of Measure, sites, categories, seasons, product manufacturers, vendor sync accounts and attributes for serialized items.
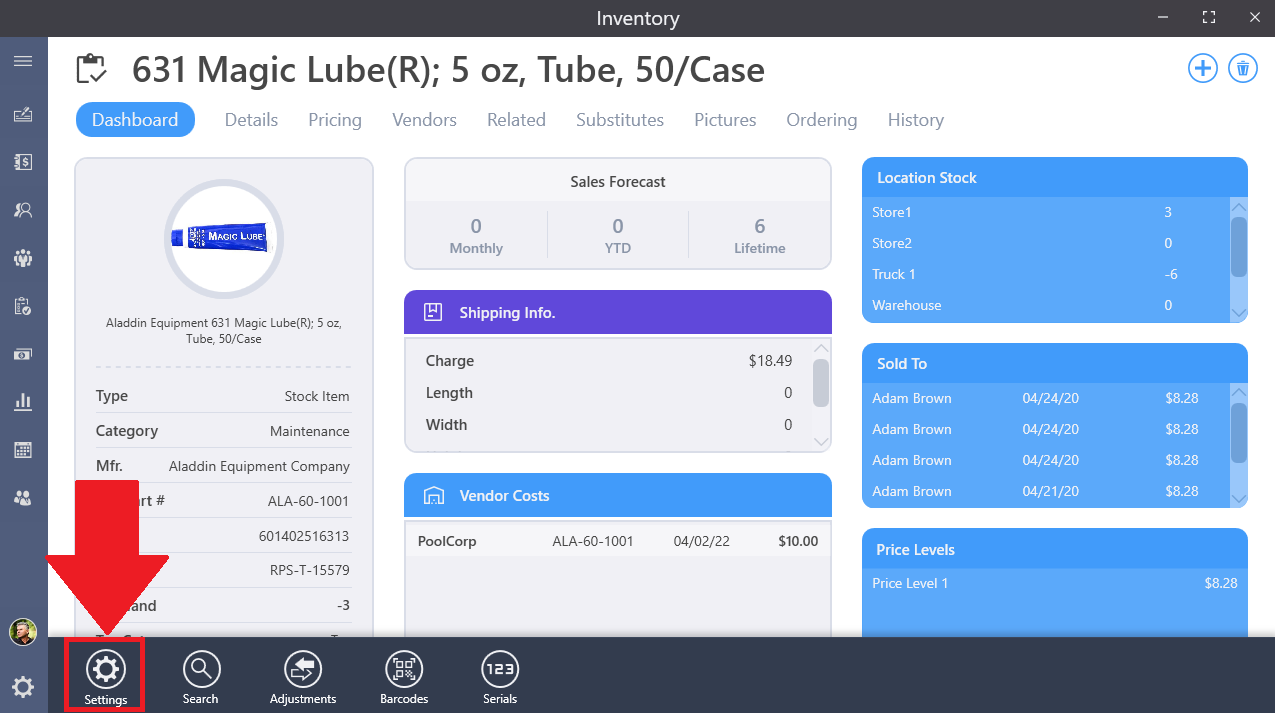
In the Inventory screen, # right click to open the app bar on the bottom and then click on settings.
Units of Measure
The first tab in settings is Units of Measure. Here we define the relationship of quantities when we purchase items for our inventory to when we sell them. For example, if we purchase a case of items and then break down that case to sell them individually.
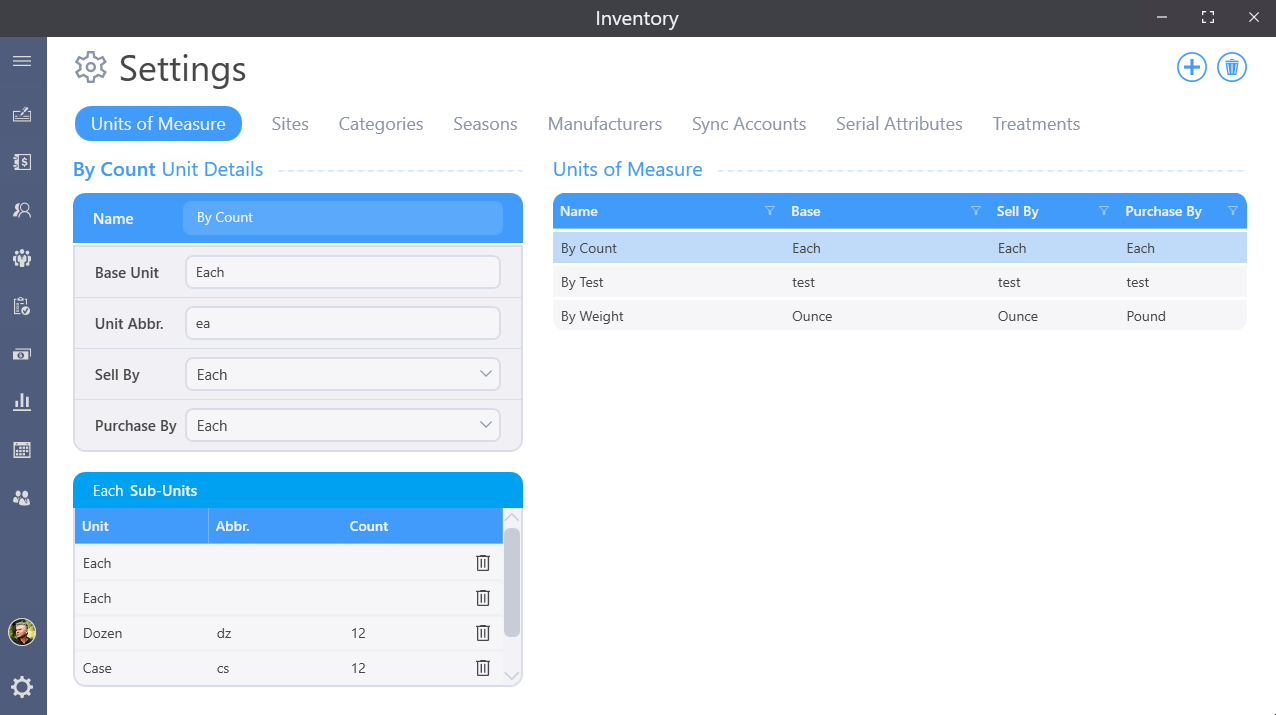
Click the plus button in the upper right hand corner to add a new unit of measure.
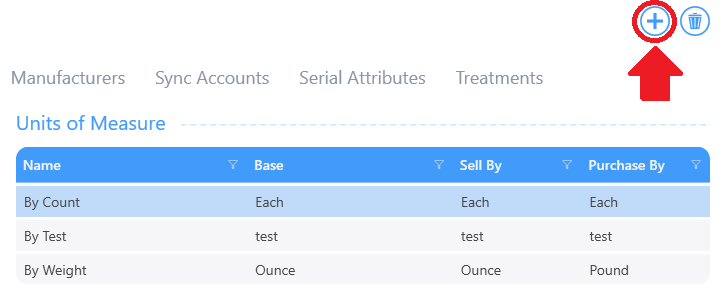
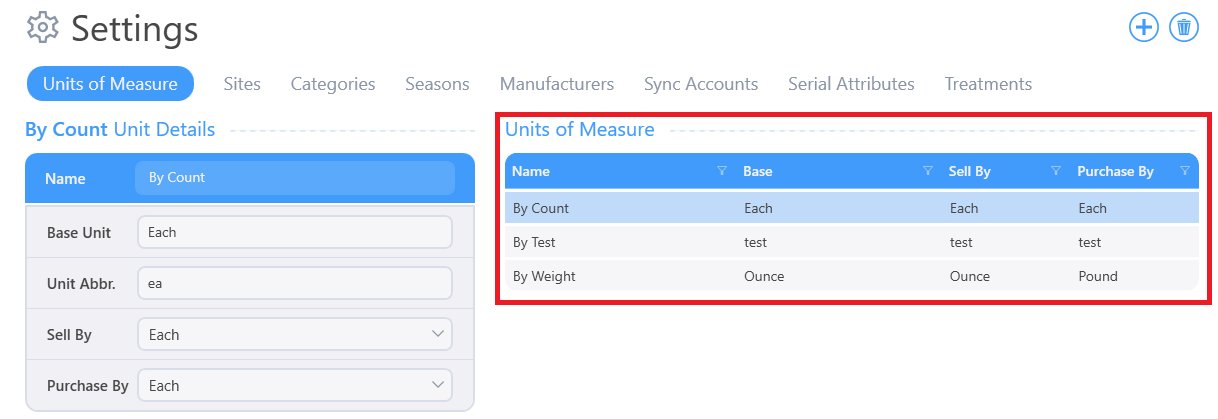
Enter a name for the Unit of Measure in the name field. In the Base Unit field enter the lowest or smallest unit type in this unit of measure. This is typically the unit you will sell a product as. In the Unit Abbr field, enter a short reference for this unit of measure. In the related measurements table, you will define multiples of the base unit. For our example, if a case is 12 items, we’ll enter Case as the Related Unit, a short abbreviation for the case, and 12 as the base count to indicate this case is 12 of our base items. In the Sell By enter the date if the product expires. In the Purchase By enter a date for this item to be purchased.
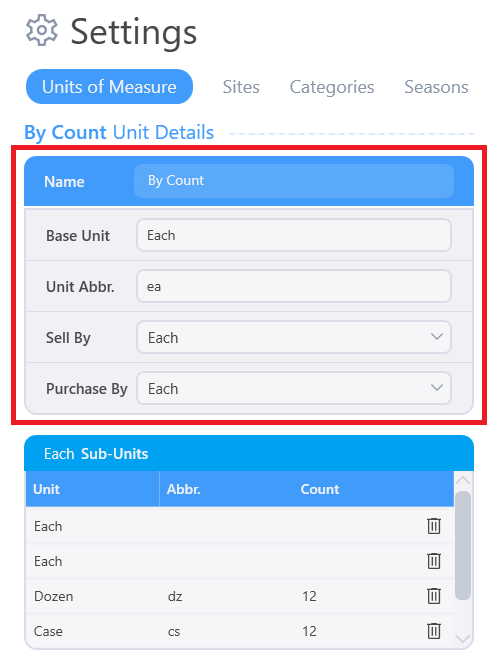
In the Unit of Measure on the right we can select from the units we have previously defined and what units we sell and purchase an item from.
Sites
Under the Sites tab you can define any location where inventory is stored for your company. This includes but is not limited to retail stores and warehouses.
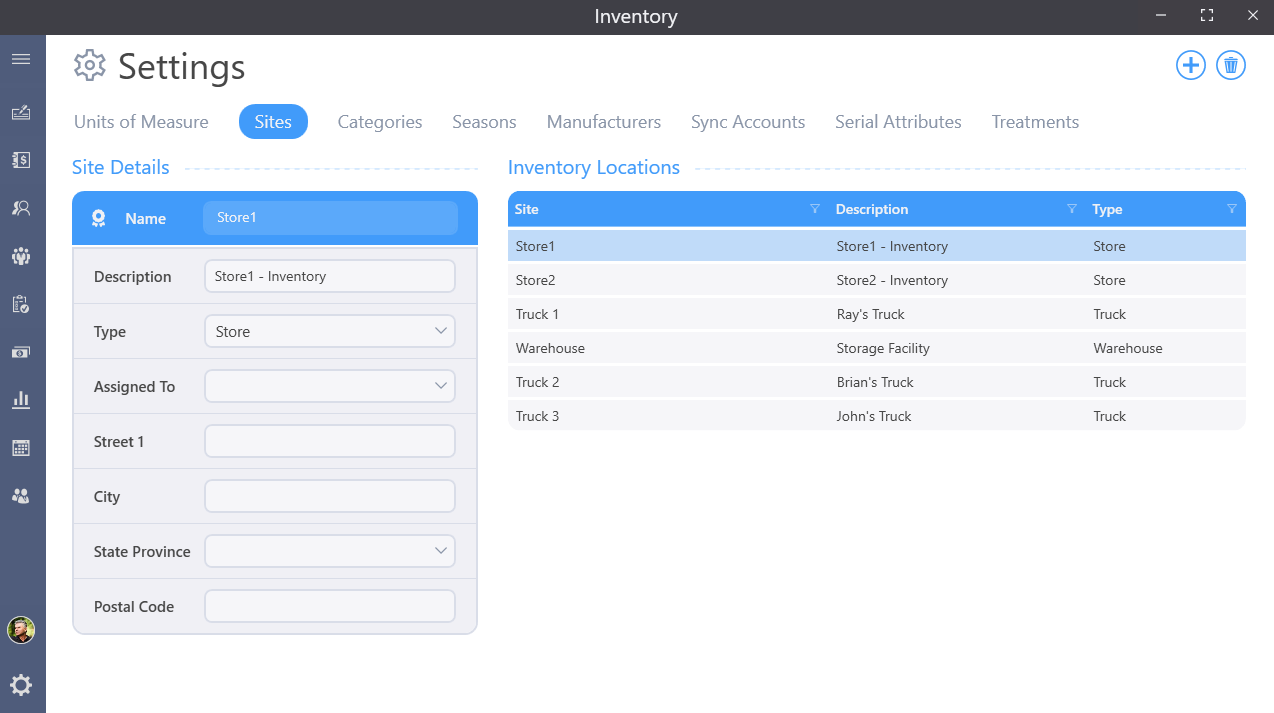
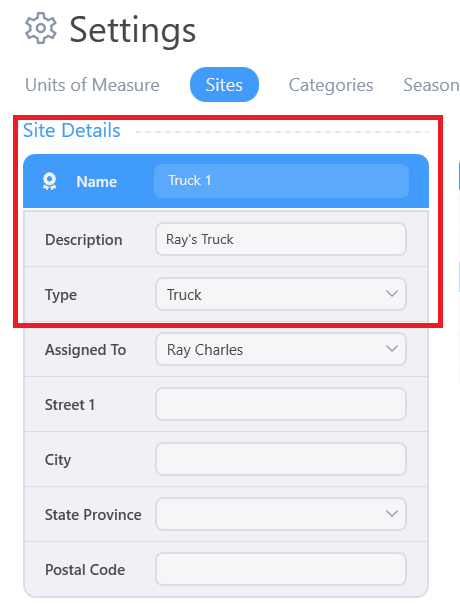
Select a site from the list to edit the sites details. Click on the plus button at the top right to add a new inventory site. Enter a name for the site. Be as descriptive as possible as this is how the site will be referred to throughout the program. The description is for some short notes about the site. Select what type of site you are creating. Defining the businesses vehicles as Truck types allows you to keep track of inventory on them and even place items on invoices right from the vehicles.
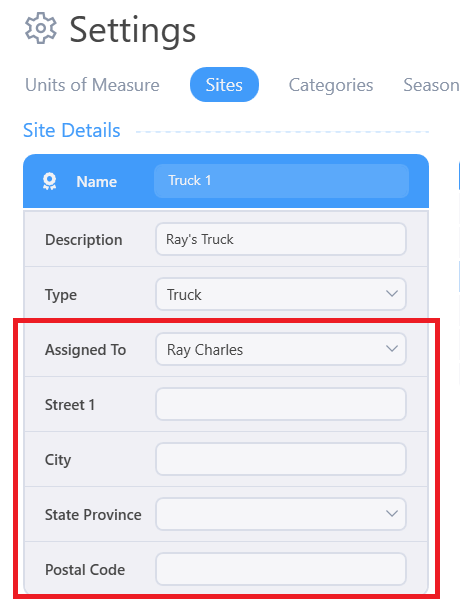
An optional physical address can be associated to the site in the Street, City, State and Postal code boxes. If there is a particular employee that is responsible for this site, for example a technician’s work truck, select the employee from the Assigned To pull down.
Categories
The Categories tab is where we can define categories for inventory items. These can be as detailed or generic as you wish to be.
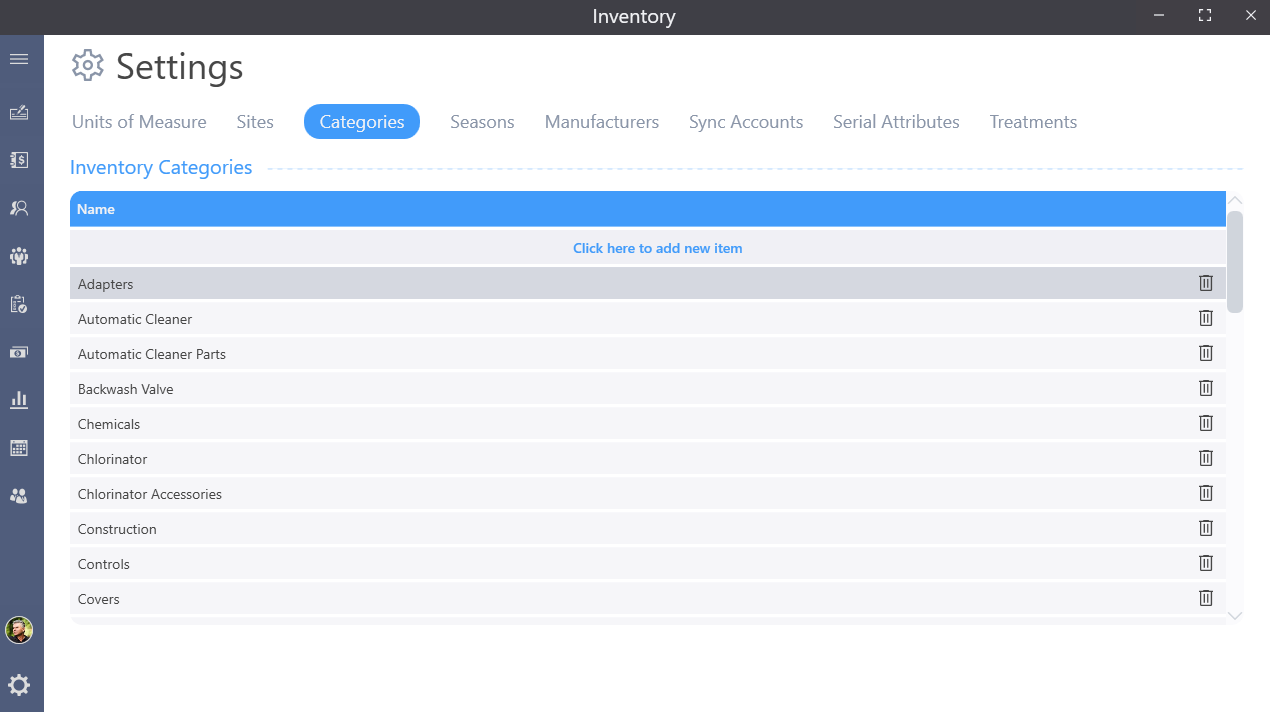
To add a category, click into the gray bar labeled “Click here to add a new item” and type in the new category name followed by the Tab/Enter key on your keyboard.

To delete a specific category, simply click on the trash can icon to the right of the category.

Note that you will not be able to delete a category if it is assigned to an inventory item. To edit a category, click into the category name and make any changes necessary.
Seasons
In the Seasons tab you can define the times of year you plan to sell, and therefore need to buy, groups of products.

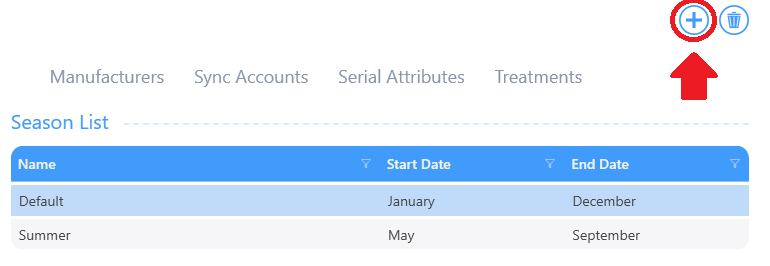
The Default Season is January through December for products you sell and need to keep in stock year-round. Click the plus button to create a new Season.
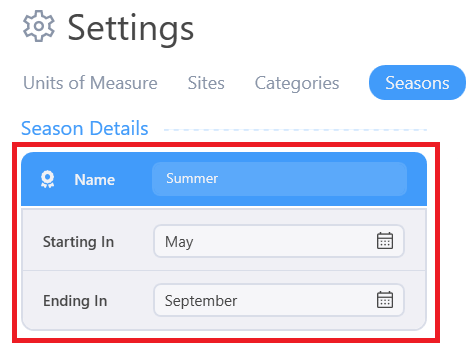
Enter a name for the season. Be descriptive here as this is how you will select the season when applying it to a product. Use the Starting in and Ending in selection boxes to define the month range that you would keep items in this season in stock.
Manufacturers
On the Manufacturers tab we can define the companies that produce our inventory items.
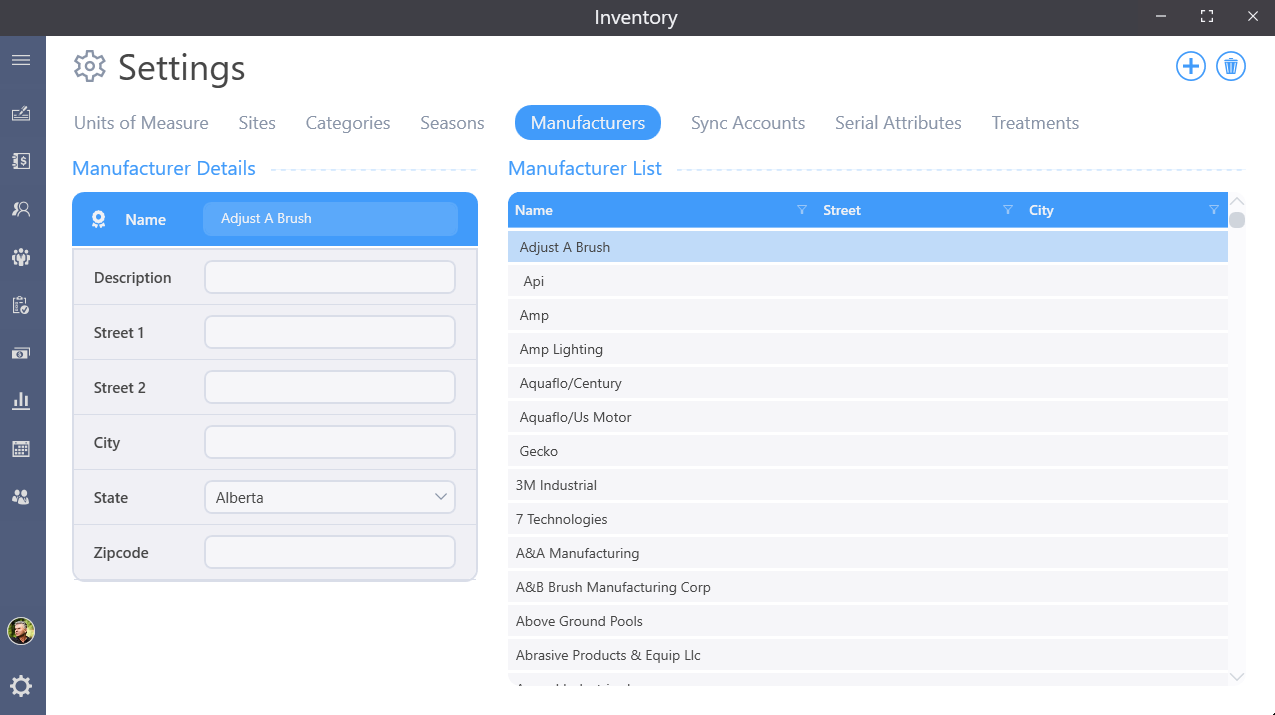
Click the plus button to add a manufacturer. Enter the Name of the manufacturer in the Name box. The description box is for an optional short note about the manufacture. The Street 1, Street 2, City, State, and Zip are for the address of the manufacturer.
Sync Accounts
The Sync Accounts tab is for entering vendor account information so the program can use online connections with those vendors.
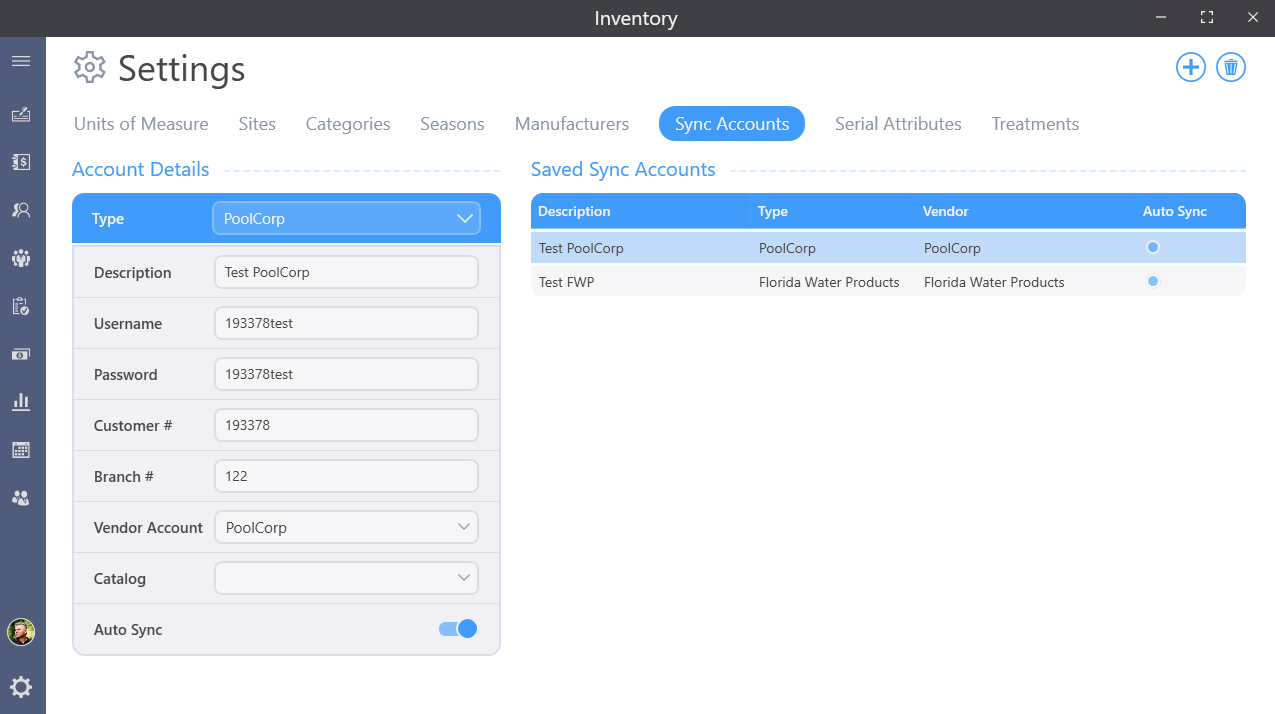
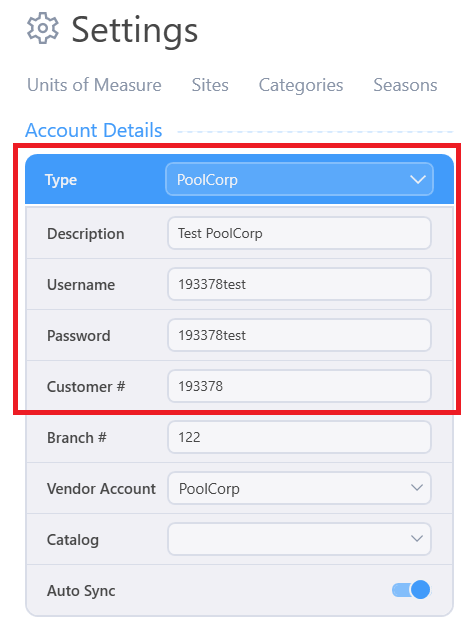
Click the plus button at the top right to add a vendor to sync an account. Select the type of sync account from the type pulldown. Details related to the selected type of account will display depending on the type selected. Enter a description for the account in the description box. Enter the username, password and Customer number into the respective fields.
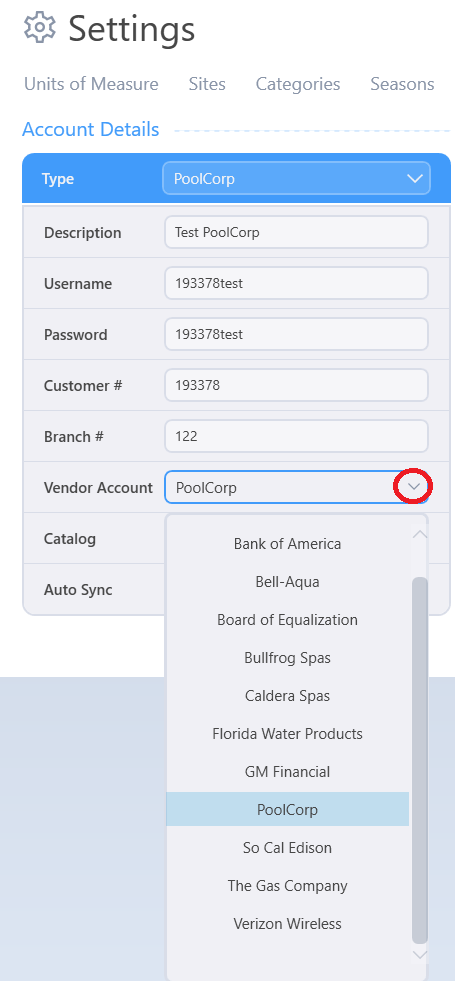
In the Vendor Account pull down select the vendor entry this account is associated with.
When relevant, Sync Interval defines how many days in between syncing pricing on a product. The Auto Sync is a switch to turn on or off syncing though this is not used with any of the currently implemented sync accounts. Additional fields may prompt for information depending on the sync account you are setting up. For example, Poolcorp accounts will require your local branch number.
Serial Attributes
The Serial Attributes tab is where you can define details that can be tracked on serialized items.
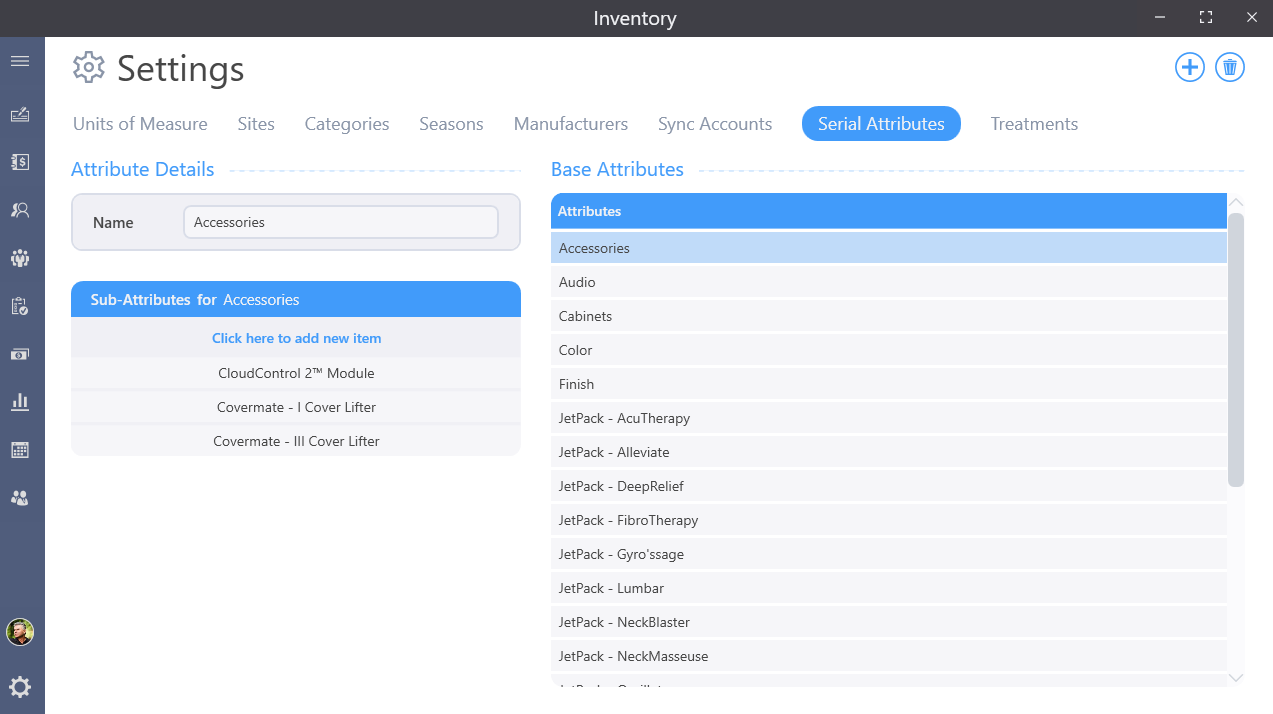
Click on the plus button at the top right to create a new attribute. Name the attribute. Think of this as a label for a selection such as Size or Color. Define the available choices of the attribute in the choices grid. Enter all necessary choices by clicking in the gray “click here to add a new item” bar and enter a choice followed by the enter key on your keyboard. To edit a choice, click on it and edit as needed. To delete a choice, select the line by clicking to the far right and then press delete on your keyboard. Note that the delete button will delete the entire attribute, not just the selected choice.
Treatments
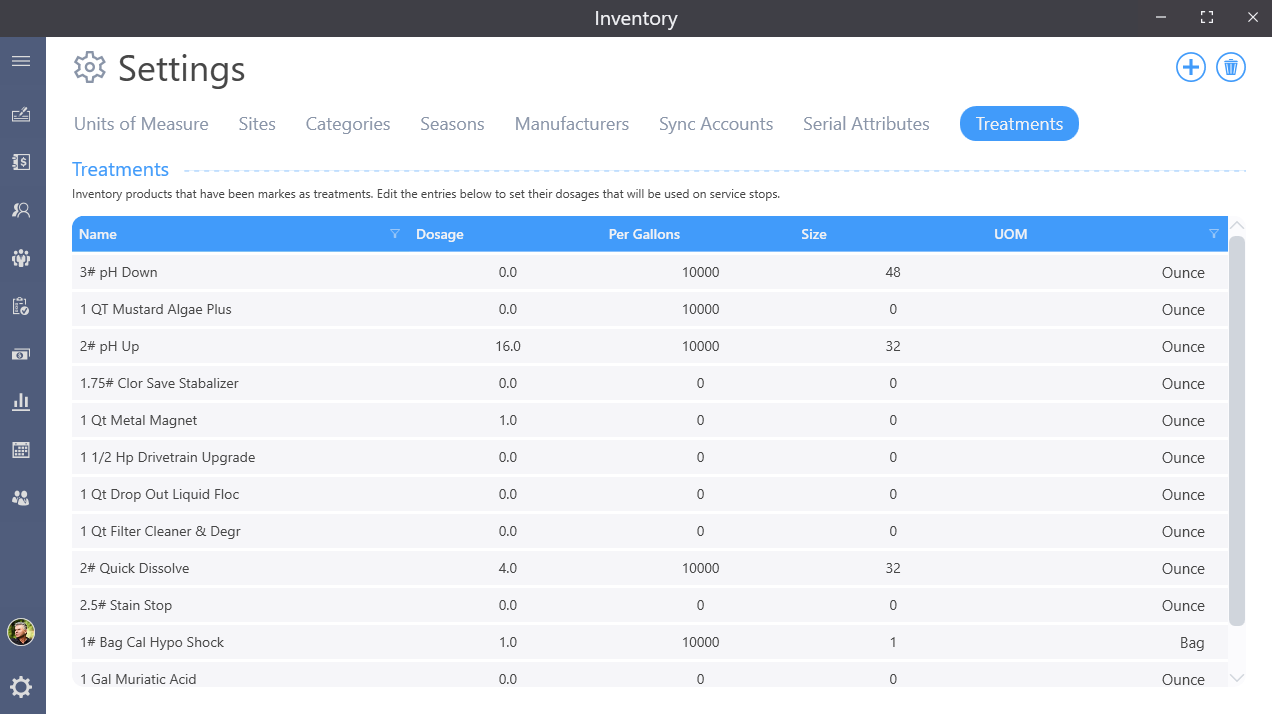
The Treatments tab is where you can define how much of a product to add to a pool or spa.
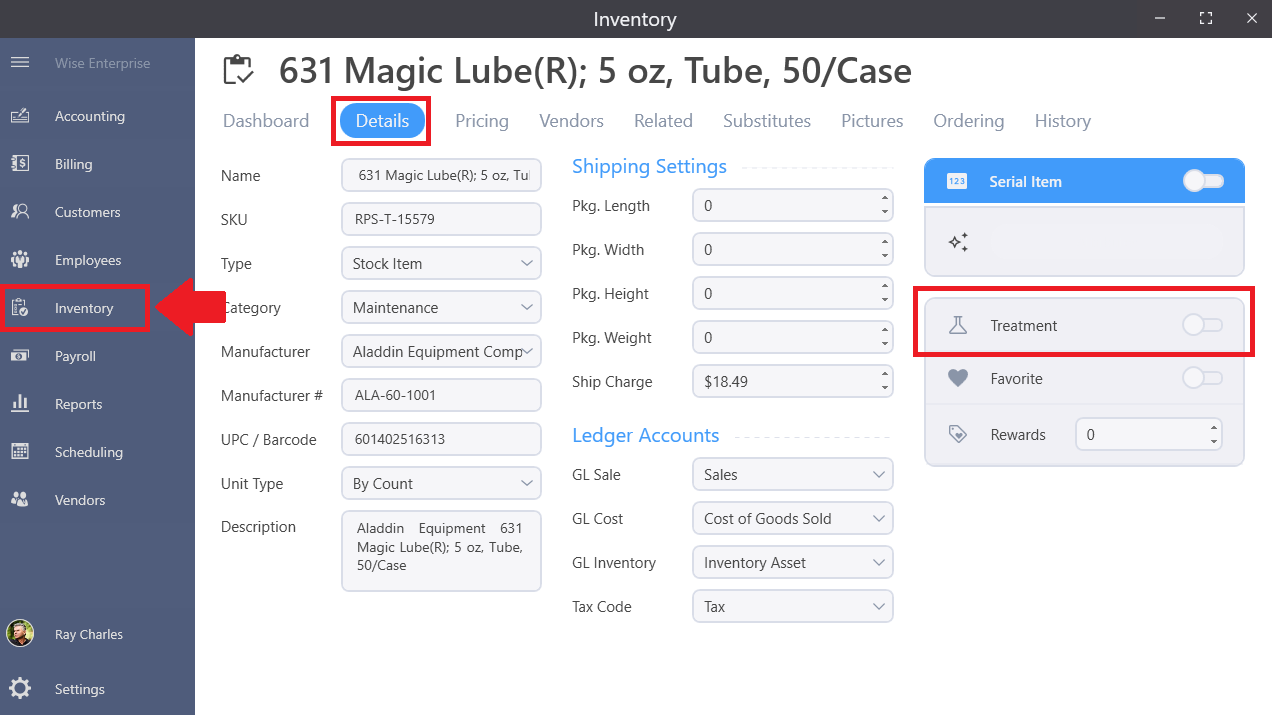
The products show on this page are the ones you have selected from the inventory details tab of the inventory. There is a selection on the lower right corner that says treatment.
Once you have selected an item for treatment, you will be able to edit the dosage, the per gallons and the size.
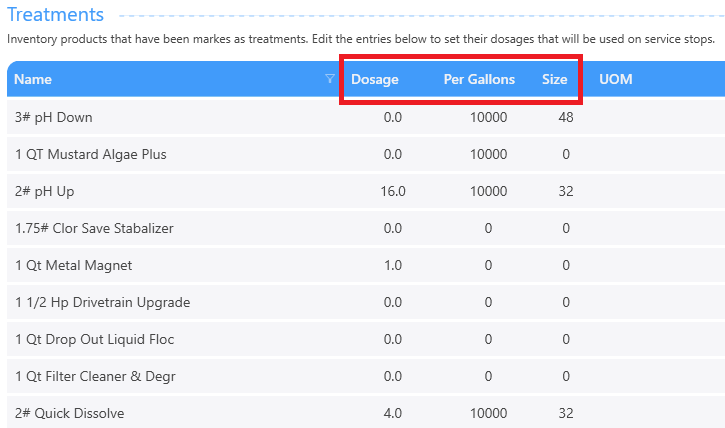
This information is usually on the back of the products you are using. For example, the back of the pH UP bottle says something such as "use 16 oz per 10,000 gallons to raise the ph. by …." This is the amount to put for the treatment.